
Customizing automotive headlight housings is a highly specialized field, involving multiple aspects such as design, engineering, materials, and regulations. Whether for repair, modification or small-scale production, special attention should be paid to the following key issues. I have classified them into several major categories to facilitate your systematic understanding and decision-making:
I. Design and engineering Compatibility
This is the most fundamental and crucial step.
Accurate original vehicle data
3D scanning and data: Ideally, a 3D scanner should be used to obtain precise point cloud data of the original vehicle headlight assembly and its installation position. This is the foundation for ensuring that the new shell fits the vehicle body perfectly, avoiding uneven gaps or installation difficulties.
Reverse engineering of original factory parts: If there is no original factory data, a meticulous disassembly and measurement of the original factory headlights are required to obtain the precise positions and dimensions of all clips, screw holes, and locating pins.
Compatibility of the installation interface
It is essential to ensure that all installation points (clips, studs, positioning holes) on the new housing are 100% compatible with the corresponding interfaces on the vehicle body. Even an error of 1 to 2 millimeters may result in failure to install, abnormal noise or poor sealing.
Internal structure and space reservation
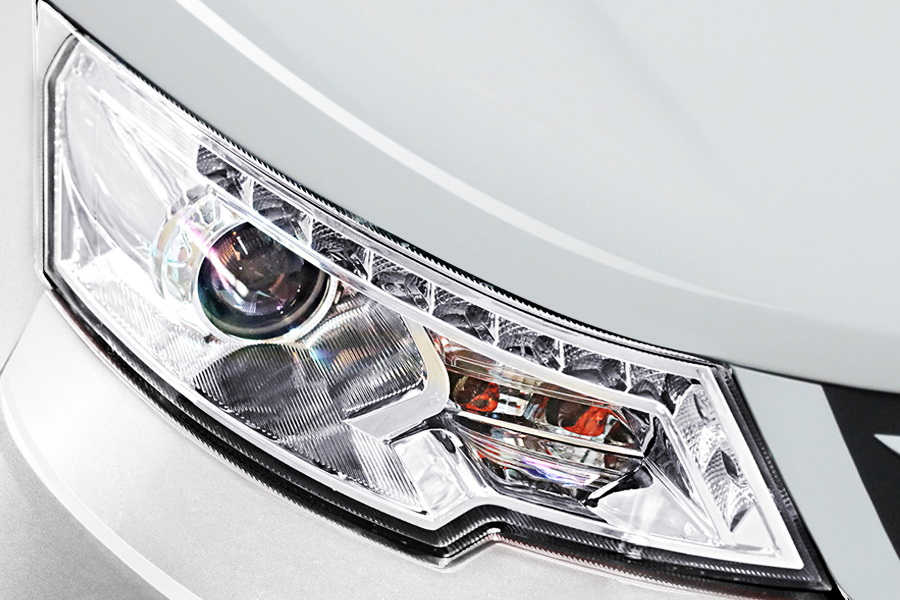
Light source compatibility: Sufficient space and fixed positions must be reserved inside the housing for specific light sources (such as halogen bulbs, xenon bulbs/ballasts, LED modules/drivers). When modifying LED or laser headlights, the space for heat dissipation is particularly important.
Reflector bowl/lens fixing position: The housing needs to be precisely fixed to the internal reflector bowl or projection lens to ensure the correct light pattern and no loosening.
Wiring harness and plug channels: It is necessary to reserve reasonable wiring space and outlets for the wiring harness and plugs to prevent them from being squeezed or worn.
Ii. Material Selection
The material directly determines the durability, light transmittance and weather resistance of the shell.
Lampshade material (transparent part) :
Preferred: Polycarbonate (PC) : This is the industry standard and is widely used due to its high impact resistance (not easy to break), high light transmittance and excellent weather resistance.
Key process: Surface hardening coating: The surface of pure PC material is relatively soft and prone to scratches. UV curing and hardening treatment must be carried out to resist scratches caused by sand and stone impacts and car washing. At the same time, it can also enhance the ability to resist ultraviolet rays and prevent yellowing and aging under long-term exposure to sunlight.
Avoid using: Ordinary acrylic (PMMA), although it has good light transmittance, has poor toughness and is fragile, making it unsuitable for car headlamp covers.
Lamp body material (base part) :
Preferred: Heat-resistant engineering plastics, such as PPO, PC/ABS alloys, etc. These materials have good dimensional stability (no deformation at high temperatures), chemical corrosion resistance (resisting oil stains in the engine compartment) and certain heat resistance (near the engine).
Iii. Manufacturing Process and Quality
Forming process
Injection molding: Most suitable for mass production, with high surface quality and precise dimensions. Molds need to be made, with high initial costs, but the cost per piece is low.
Vacuum forming /3D printing: Suitable for small batches, prototypes or personalized customization. 3D printing (such as stereolithography SLA or SLS) can produce very complex structures, but the surface smoothness and strength are usually not as good as those of injection-molded parts, and may require post-grinding and spraying.
Sealing performance
This is the “lifeline” of the headlight assembly. The shell design must include reliable sealing grooves.
Sealant: Automotive-grade hot melt sealant (such as butyl sealant /PUR sealant) must be used. The sealing process needs to be carried out in a dust-free or low-dust environment to ensure that the glue lines are uniform, continuous and without any breaks. Sealing failure can cause fogging, water and dust to enter the interior of the headlights, directly damaging the internal electrical components.
Surface treatment
Lampshade: Hardened coating on the outside, and anti-fog coating may also be required on the inside.
Lamp body: Usually, primer and topcoat spraying are required to ensure good adhesion, weather resistance and color matching with the original vehicle. The paint needs to be able to withstand the high temperature and oil stains in the engine compartment.
Iv. Optical Compliance with regulations
Light type and photometric performance:
The core function of headlights is to provide illumination and they must not cause glare to others. A single casing is not enough; it must be paired with an optically designed reflector bowl or lens.
When customizing the housing, it is essential to ensure that its coordination with optical components (reflector bowls/lenses) can produce light and dark cutting lines that comply with safety regulations. Otherwise, homemade headlights may fail the annual inspection and pose safety hazards.
Regulatory certification
In different countries and regions, automotive lighting fixtures need to pass mandatory certifications, such as China’s CCC certification, the EU’s E-mark certification, and the United States’ DOT certification, etc.
If a custom housing is used for vehicle sales or as a substitute for parts, it is necessary to consider whether the final headlight assembly it forms can meet these regulatory requirements. For personal modifications, although the requirements may be relaxed, compliance with regulations is the basic guarantee of safety.
V. Suppliers and Cost Considerations
Looking for professional suppliers
Look for manufacturers with experience in manufacturing automotive lamps or components, rather than ordinary plastic mold factories. They have a better understanding of material properties, sealing processes and optical requirements.
Mold opening cost and minimum order quantity (MOQ) :
If injection molding is adopted, the mold cost is a huge initial investment (ranging from tens of thousands to hundreds of thousands of RMB). It is necessary to clarify the ownership of the mold and its subsequent maintenance.
Suppliers usually have a minimum order quantity requirement.
Sample testing
Be sure to make samples (T0 samples) and conduct strict tests before mass production:
Installation test: Install it on the actual vehicle and check the matching degree.
Environmental simulation tests: including high-temperature and high-humidity tests, cold and heat shock tests, rain tests, vibration tests, ultraviolet aging tests, etc., to simulate several years of usage conditions.
Optical testing: Test whether the light type meets the standard in a darkroom.
Post time: Nov-14-2025